On June 10th 2013, I was sitting in the upper floor of Moscone West in San Francisco, along with a few thousand fellow iOS and Mac developers.
Roused by a somehow stirring video of nothing but words and dots, I sat back and let the RDF wash over me. iOS 7 is coming, and it’s going to be awesome!
The keynote started as normal. Retail stores. Shipped a quintillion iPhones. Yawn. Craig Federighi started demoing 10.9 Mavericks, which was pretty interesting, but the keynote was mainly for demoing consumer features. I noted a few things that looked particularly interesting and started getting excited about the new APIs that would be coming in Mac OS X.
Then, Phil Schiller came onstage. I’ve had a soft spot for Schiller ever since he pretended to be on a roller coaster while demoing iChat video effects during a keynote years ago, and I always mentally shout “PHIL!!!” when he comes onstage, but I don’t really know why. Phil started talking about minor bumps to Macbook Airs. Zzzzzz.
Wait, what’s this? Sneak peek of new Mac hardware? Finally, the new Mac Pro! Everyone cheers. I cheer. I feel a little bit sad that now the iMacs are powerful enough for everything I need I can’t justify the expense of a Mac Pro any more, but I’m excited. “We’re going to go a little over the top…” says Phil.
My ribcage starts to rumble. The bass ramping up throughout the room as the video starts was more of a feeling than a sound. Angles start flashing across the screen and not much else. Sigh. Another non-announcement.
Wait. It’s round. If it’s round it has to be…
Oh no. No no no no no.
It’s small.
“Can’t innovate any more, my ass!” Phil quipped, a smile on this face giving a way a sense of genuine pride. In seconds the non-annoucment had turned into a full-on discussion of the new machine.
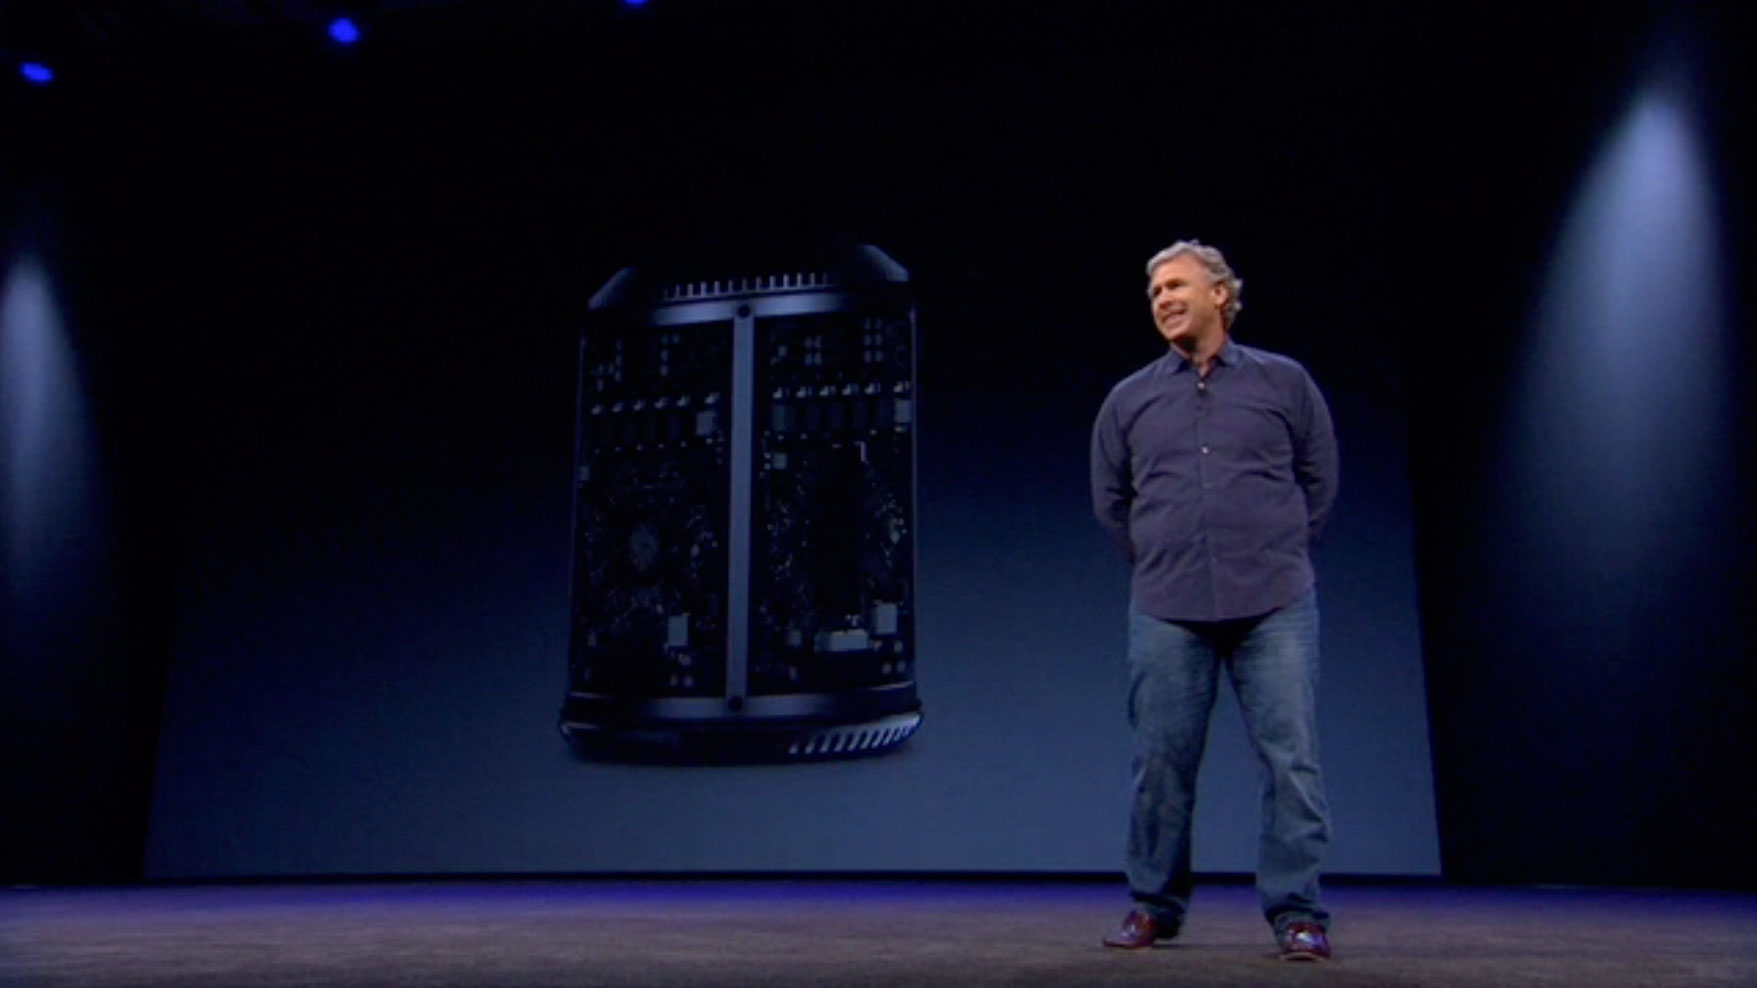
Phil started talking about the design. He got to “Unified Thermal Core” and I was gone. They’ve made a spiritual successor to the G4 Cube! Phil started reeling off numbers I didn’t care about as I worked myself into a tizzy.
You see, I have a special bond with the G4 Cube. It was my first “real” Mac, and my mother bought it for me when I was a kid. I admired the beauty of the engineering of that machine. I learned to program on that machine. I cycled six miles to my local Mac reseller the day Mac OS X 10.0 came out and excitedly cycled home in the rain to install it on that machine. I’ve had many Macs since, but none had the soul and beauty of the G4 Cube. Coupled with a pile of nostalgic memories, I loved that machine so much I still have one to this day.

Generation Gap
Well, that was it. There is no way I couldn’t have one. I let my fiancée know the bad news, then tweeted what I thought was a fun but stupid screenshot of our conversation in what turned out to be my most popular tweet of all time.
Oh well, I was really looking forward to getting married next year :-( pic.twitter.com/cE5c7SZk8P
— Daniel Kennett (@iKenndac) June 10, 2013
Don’t worry — we still got married.
Now, time to retroactively justify spending so much money on a computer!
The Review
Disclaimer: This review is about day-to-day usage of a 2013 Mac Pro from the point of view of a Mac OS X and iOS developer, using tools like Xcode to get work done. The benchmarks here are only useful when compared to other benchmarks in this post, and my main focus is the overall “feel” of the machine compared to other modern Mac equipment rather than raw numbers. For detailed, millisecond-precise benchmarks I can highly recommend Ars Technica’s review of this machine.
What I’m Working With
Let’s begin by discussing what I’m working with. First, the hardware. I’ll mainly be comparing the Mac Pro with my work-provided 15” Retina MacBook Pro since they’re the two machines I have access to, and my wife won’t let me fill up her iMac with my crap (which, to be fair, is probably a wise choice).
| 2013 Mac Pro | 2013 15" Retina MacBook Pro | |
| CPU | 3.5 GHz 6-Core Intel Xeon E5 | 2.7GHz 4-Core Intel Core i7 "Ivy Bridge" |
|---|---|---|
| RAM | 32GB 1867 MHz DDR3 ECC | 16GB 1600 MHz DDR3 |
| Graphics | Dual FirePro D700 6GB | NVIDIA GeForce GT 650M 1GB |
| Storage | 1TB PCI-E SSD | 256GB PCI-E SSD |
| Specced Price | $5,799 / £4,739 / €5,199 (DE/FR) | $2,799 / £2,399 / €2,799 (DE/FR) |
As for coding projects, I deal with a number of projects both at work and personally as side projects. Of these, I’ve chosen two of them to use in this review — for simplicity’s sake, I’ll call them Large Project and Small Project.
I’ve chosen these projects as I feel they reflect two common use cases — Large Project is a product typical of a cross-platform company with many people working on components of the same product, and Small Project is a typical small app that a small development shop or single developer might produce in a couple of months.
To reiterate my disclaimer above, I’m not going to go into detail about the exact number of lines of code, partly because of sensitivity concerns as I’m talking about a commercial application, and partly because it doesn’t really matter. However, to give you an idea of the size of the projects:
| Small Project | Large Project | |
| Derived Data* | 150MB | 3.98GB |
|---|---|---|
| Debug Binary Size** | 2MB | 105MB |
| No. of Source Files | 45 Obj-C .m, 30 C++ .cpp
|
I have no idea. A lot. |
| Benchmarked SDK & Architecture | Mac OS X 10.9 (x86_64) | iOS 7.1 Simulator (i386) |
* A project’s “Derived Data” is a collection of files generated by Xcode while indexing and building a project. It contains object files, indexes, build logs and various other files that allow Xcode to cache unchanged parts of a project for faster incremental building. The size was measured by deleting the project’s existing Derived Data folder, opening the project and doing a single debug build for a single architecture, then waiting for Xcode’s indexing process to complete.
** Debug binary only, no resources, for a single architecture.
The Small Project is a small Objective-C Mac app that contains 3 targets, all of which are dependencies of the main application and are built as part of a normal build. It contains some C++ code in the form of a third-party open source library, and has a nice and simple build process — open Xcode, push build.
The Large Project is a large iOS app that contains over 100 targets, most of which are dependencies of the main application and are built as part of a normal build. Some targets are heavily or completely C++ based, and the project has a very complex build process involving a wide variety of tools and build scripts in various languages.
Benchmarks
Alright, let’s get down to some benchmarking!
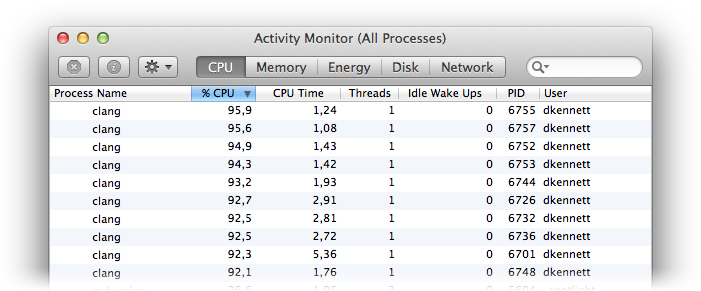
Build all the things! Activity Monitor wasn’t running during benchmark runs, but typical day-to-day apps were (email, Safari, Twitter, etc) to reflect a “normal” environment.
Since my Mac Pro has 32GB of RAM, I also benchmarked building the projects while using a RAM disk for Xcode’s Derived Data folder. I didn’t do this on the MacBook as 16GB isn’t enough to do this with the Large Project.
Sidebar: If you’re a developer reading this, I made a little command-line tool that simplifies the process of creating a RAM disk, designed to be friendly to being run at startup. You can find it over on my GitHub pages.
The builds had some Xcode debug build time optimisations applied as described over here, and are all debug builds for a single architecture.
| Small Project | Large Project | |
| MacBook Pro | 9 seconds | 6 minutes, 2 seconds |
|---|---|---|
| Mac Pro (SSD) | 6 seconds | 3 minutes, 58 seconds |
| Mac Pro (RAM Disk) | 5 seconds | 3 minutes, 40 seconds |
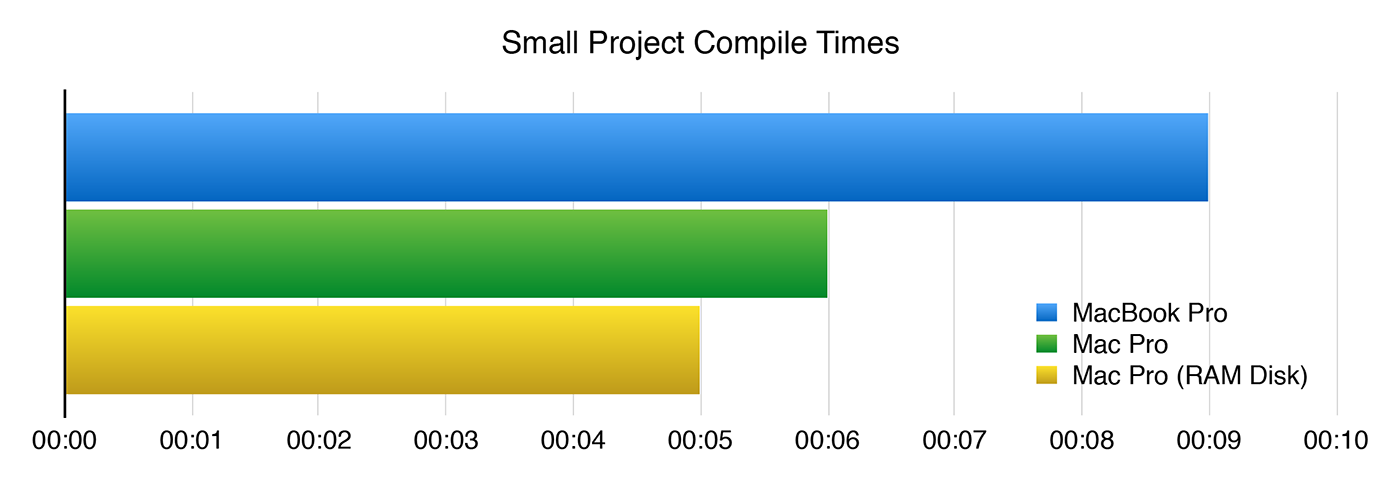
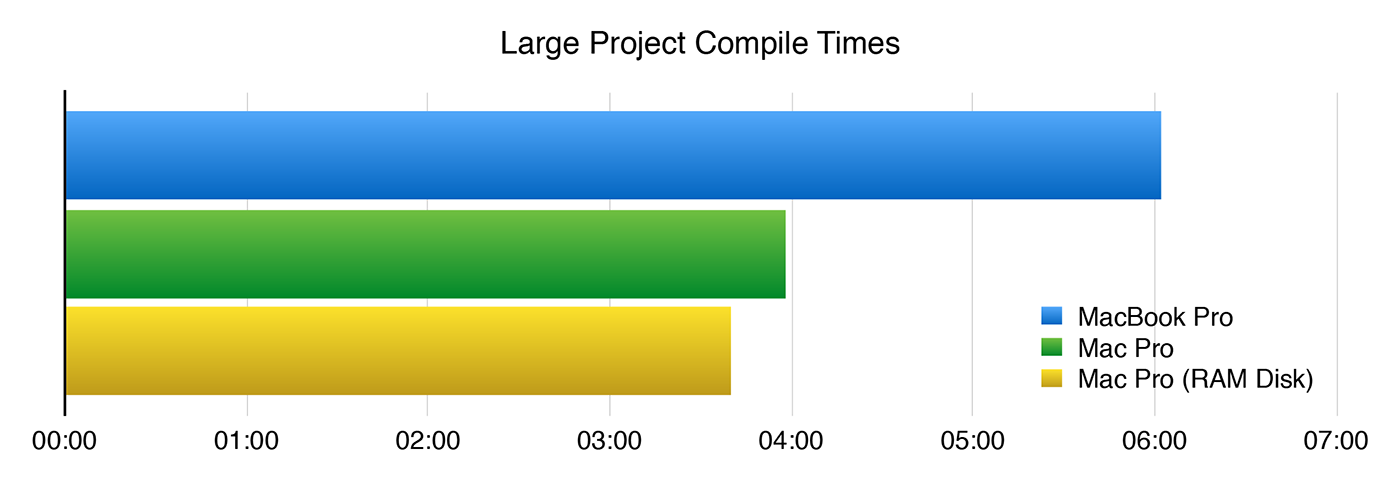
As you can see, the Mac Pro builds projects around a third faster than my MacBook, which, in itself, isn’t all that surprising. With the Derived Data folder placed on a RAM disk, the Mac Pro is 40% faster than the MacBook.
One nice thing to note is that while doing these benchmarks, I had all six cores of the machine pegged at 100% for towards an hour. During that time, the fans of the Mac Pro barely made a whisper — a welcome change from the screaming fans of the MacBook.
A Note On Release Builds
I considered doing benchmarks using release builds as they’ll be slower as optimisation is CPU-intensive, and if you’re building for multiple architectures build time will almost increase linearly (around twice as long for two architectures, three times as long for three, etc). As a rough guide, a typical release build for an iOS app that supports both arm64 (iPhone 5S and iPad Air) and armv7 (everything else at the time of writing) will take roughly 2.5x as long as a single-architecture debug build.
However, this review is focusing on a developer’s day-to-day workflow rather than build server duties. However, I did do a couple of release builds of the Large Project, and you can expect speedup to be similar to that of debug builds.
Day-To-Day Workflow in Xcode
This is where things get interesting. Clean builds only tell a small portion of the story — day-to-day, clean builds are somewhat of a rarity. Instead, we make many small incremental builds as we write some code, make sure it builds, then test the changes out by running the application or running unit tests.
My MacBook is my daily work machine, and we’ve been at each other’s side for a year or so now. I know it in and out, and until I started working on the Large Project with my Mac Pro, it felt fine.
A typical small task I might do involves finding a file, opening it up and finding the method I need to work on. Then, I’ll need to quickly look up the API reference of something I need to add to that method, then write the new code and test it.
It goes like this:
-
Command-Shift-Oto open “Open Quickly”. - Start typing the class name
HTTPIma…. - When the file comes up in the list, press
Returnto open it. - Navigate to the method I need.
- Declare an instance of the new API I need to use:
NSURLConnection *connection;. -
Command-Option-ClicktheNSURLConnectionname to open its header in the Assistant Editor. - Read the documentation and amend my code accordingly.
- Close the Assistant Editor.
- Run the application and test the new code.
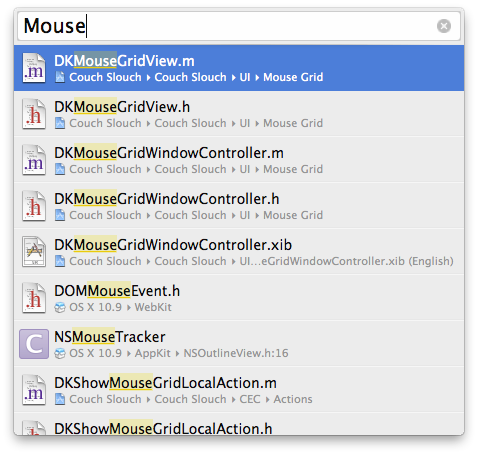
Xcode’s “Open Quickly” panel
After a week using the Mac Pro and doing this regularly, I tried it again on my MacBook.
-
Command-Shift-Oto open “Open Quickly”. - Start typing the class name
HTTPIma…. - When the file comes up in the list, press
Returnto open it. - Open Quickly is still processing my typing, so by the time the
Returnregisters, a different file is selected. - Open the wrong file. Grumble.
- Repeat, this time waiting until Open Quickly has settled down.
- Navigate to the method I need.
- Declare an instance of the new API I need to use:
NSURLConnection *connection;. -
Command-Option-ClicktheNSURLConnectionname to open its header in the Assistant Editor. - Beachball.
- 5 seconds later, the Assistant Editor appears.
- Read the documentation and amend my code accordingly.
- Close the Assistant Editor.
- Beachball.
- 5 seconds later, the Assistant Editor disappears.
- Run the application and test the new code.
My MacBook can’t possibly be this bad, can it? After working on the MacBook for a few hours, I got used to it again and realised that it didn’t seem slow before because I’d briefly do something else while waiting for Xcode to catch up — glance at Twitter, take a sip of my drink, etc.
My whole Xcode experience is like this on my MacBook with the Large Project. Getting to the Build Settings pane from a source editor takes a good few seconds as it takes time to bring up each new panel as you navigate there. After a year of nothing else I’d gotten so used to it I didn’t even notice it any more.
I’ve found this week with my Mac Pro to be far more productive than working with my MacBook. It may partly be due to the fact I’m also working from home, away from the distractions and annoyances of the office, but the fact I don’t have time to glance at Twitter or sip my drink as I navigate around certainly helps keep my concentration sharp.
It’s important to note that only the Large Project makes my MacBook behave this way. Working on smaller projects, including work projects much larger than the Small Project I talk about here, the Xcode experience is as fast and painless as it is on the Mac Pro.
Day-To-Day Workflow in Other Development Tasks
I don’t really use huge datasets in anything other than Xcode, so nothing surprising here. grep is noticeably faster on the awesome SSD, as is switching around branches.
One thing that is nice is the ability to run several virtual machines at once without having to care about system resources. This is particularly handy when testing features that involve remote controlling — I can have multiple iOS Simulators running at once without problems.
Conclusion
If you have a reasonably modern, well-specced machine and are bumping into its limits, the Mac Pro gives a surprising amount of extra freedom that I didn’t expect. My MacBook isn’t a bad machine at all, and I just assumed the large project I work with would bring Xcode to its knees on anything. I’ve felt a genuinely large improvement to my day-to-day productivity on the Mac Pro, to the point where working on my MacBook feels clunky and annoying.
If your current workload is bringing your computer to a grinding halt, you might find the Mac Pro gives a refreshing freedom to your day-to-day workflow. If that’s the case, I’d really recommend it.
Otherwise, I’d really struggle to justify the cost purely on a development basis and have a really hard time imagining an indie developer or small development shop generating a project large enough to see the benefits — especially since the newer iMacs and MacBook Pros are excellent development machines and give a great price-performance ratio.
In short, if you have a modern machine and aren’t already thinking “I really need something more powerful than this”, the Mac Pro is really hard to justify.
Unless you loved the G4 Cube — then you should buy one anyway, because the G4 Cube was awesome.

Perhaps I should get that printed on a mug.